Troubleshooting Guide: "Network Unavailable" Error in 3uAirPlayer
![]() 02/04/2026
02/04/2026
![]() 22770
22770
When 3uAirPlayer displays the "Current network is unavailable" prompt, follow these comprehensive steps to diagnose and resolve the issue

I. Basic Network Connectivity Check
1. Check Physical Connections
Wired Connection: Ensure the Ethernet cable is securely plugged into both the computer and the router ports.
Wireless Connection: Confirm the computer is successfully connected to Wi-Fi and has strong signal strength (try switching to a different Wi-Fi network if available).
2. Verify Internet Access
Open your browser and visit www.3u.com (the official 3uTools website). If the page does not load, your local network connection is faulty.
II. System and Software Interference
1. Check System Time. Inaccurate system clocks can cause connection authentication failures.
Click the time in the bottom-right corner of the taskbar to ensure the date and time are correct.
To fix: Right-click the time > "Adjust date/time" > Manually set the correct time or toggle on "Set time automatically."
2. Disable VPN Software
If you are using a VPN (especially those used for international access), please disable it temporarily, then restart 3uAirPlayer to test the connection.
3. Check Device Name for Special Characters.
Path: Go to Settings > System > About > Device specifications(Device name).
To fix: Check if the device name contains emojis, special symbols, or non-standard characters. If it does, rename the PC using plain text/numbers only, and try mirroring again.
III. Advanced Network Configuration Optimization
Step 1: Inspect Network Configuration (via PowerShell)
1. Press Win + R, type powershell, and press Enter.
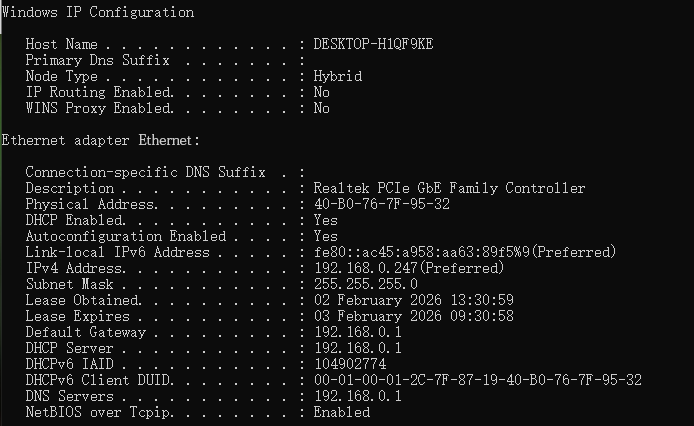
2. Type the command ipconfig /all and press Enter
Check the "Ethernet" section for wired networks or the "Wireless LAN adapter WLAN" section for Wi-Fi.
Confirm if the "Default Gateway" and "DHCP Server" addresses match. If they match, the gateway configuration is normal.
Step 2: Manually Configure DNS Servers
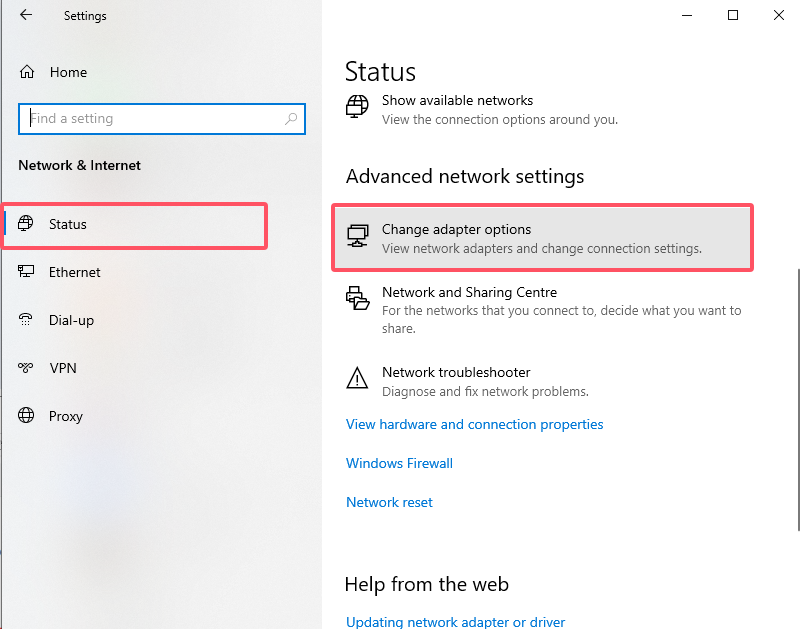
1. Go to Settings > Network & Internet > Advanced network settings > More network adapter options.
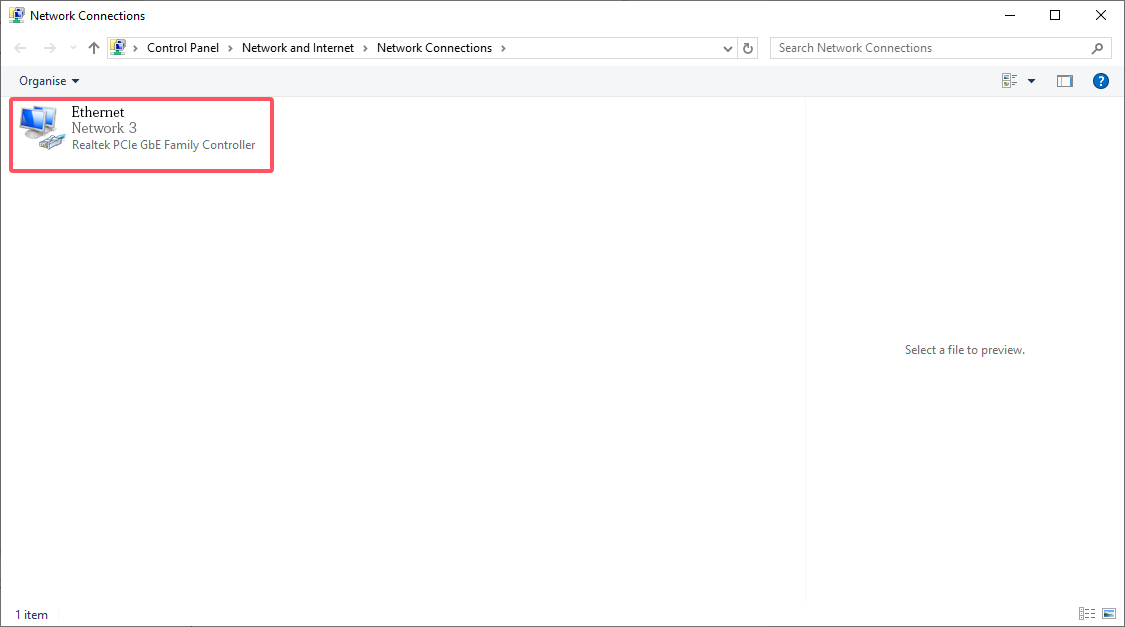
2. Right-click your active adapter (Ethernet or WLAN) and select Properties.
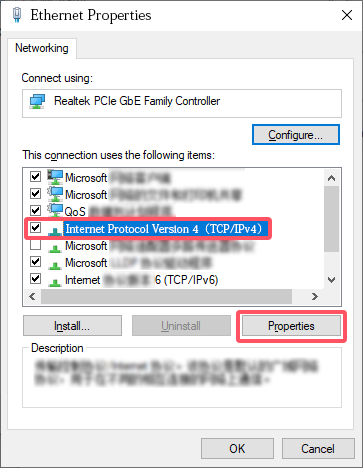
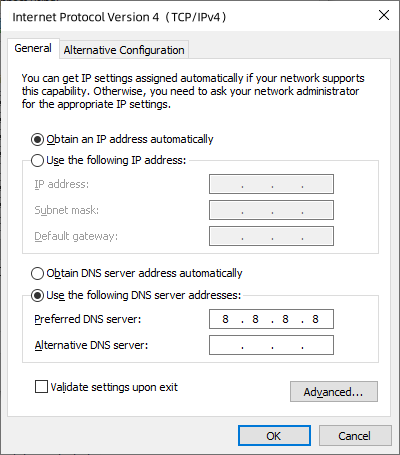
3. Double-click "Internet Protocol Version 4 (TCP/IPv4)."
Select "Use the following DNS server addresses" and enter:
Preferred DNS: 8.8.8.8
4. Click OK to save.
Step 3: Flush DNS Cache
Return to the PowerShell window, type ipconfig /flushdns, and press Enter to clear the cache.
IV. Hardware Reset
If the steps above do not work, try:
1. Restart the Router: Disconnect the power for 30 seconds, then plug it back in.
2. Restart the Modem: If you use a separate Modem and Router setup, restart the Modem as well. Test the connection once the network is fully restored.
V. Resolving IP and Gateway Abnormalities
5.1 IP Address Configuration Issues
1. Cause: Device is connected directly to the Modem (Optical Modem) instead of the Router, or there is an IP conflict with another device.
2. Solution:
Check Connection: Ensure your PC is plugged into the Router’s LAN port, not the Modem’s port.
IP Conflicts: If using a static IP, ensure it is unique within your subnet.
Support: If DHCP (automatic IP) still fails, contact the official email: 3uRemote@gmail.com
5.2 Gateway Configuration Issues
1. Cause: Incorrect gateway parameters prevent the device from obtaining a valid IP and reaching the internet.
2. Solution:
Subnet Check: If using a manual IP, ensure the IP Address and Default Gateway are on the same subnet (e.g., if the gateway is 192.168.1.1, the IP must be 192.168.1.xxx).
Support: If the gateway shows as abnormal while on "Automatic" settings, reach out to the development team via the support email mentioned above.